RSS

Strawberry Frozen Yogurt Squares


1 can (14 ounces) fat-free sweetened condensed milk, divided
Non-stick cooking spray
1 cup Post Grape-Nuts™ or similar cereal
1/2 teaspoon ground cinnamon
Pinch ground cloves
1 package (10 ounces) frozen strawberries (about 2 1/2 cups)
3 cups fat-free strawberry yogurt

Measure 1 cup of sweetened condensed milk; set aside. Line 8x8-inch baking pan with
foil; spray with non-stick cooking spray. In medium bowl, combine cereal, cinnamon,
cloves and remainder of sweetened condensed milk. Spread cereal mixture evenly on bottom of pan, place in freezer.
Place strawberries and yogurt in a blender; cover and blend. Add 1 cup sweetened condensed milk; blend until smooth. Pour
mixture over cereal, smoothing to edges of pan. Cover with foil (or plastic wrap) and freeze 8 hours or until firm.
Use edges of foil to loosen and remove from pan; let recipe thaw for 5 to 10 minutes. Cut into squares and serve.

Lanjut membaca “Strawberry Frozen Yogurt Squares”  »»
  • Digg
  • Del.icio.us
  • StumbleUpon
  • Reddit
  • RSS

Vanilla Mochaccino


2 coffee cups of strong French roast coffee
2 cups of fat-free milk
1 tablespoon of unsweetened cocoa powder
1 tablespoon of sugar
1 teaspoon vanilla extract

Brew 2 cups of French roast or espresso-style coffee and pour into a small saucepan with
milk, cocoa powder, sugar and vanilla extract; simmer for 5 minutes. Let cool for 5 minutes;
pour over ice in 2 large lidded cups and shake well before serving.
Note: This beverage can also be prepared warm. After simmering ingredients, blend with a
hand-held electric mixer to create a frothy top and pour into coffee mugs.

Lanjut membaca “Vanilla Mochaccino”  »»
  • Digg
  • Del.icio.us
  • StumbleUpon
  • Reddit
  • RSS

Orange Cream Chiller


3 ounces orange juice concentrate
1 cup low-fat milk
½ cup nonfat Greek style plain yogurt
1 small frozen banana or 3 frozen strawberries
1 teaspoon honey
½ teaspoon vanilla extract

Place all ingredients in a blender. Blend until smooth. Serve immediately or store in refrigerator

Lanjut membaca “Orange Cream Chiller”  »»
  • Digg
  • Del.icio.us
  • StumbleUpon
  • Reddit
  • RSS

Cleavers Garlic Lemon Chicken over Avocado Fennel “Salsa”


This recipe is sure to please both the cooks prep time and the guests who enjoy it.
Marinate chicken breasts in cleavers garlic, lemon and herbs seasonings over night. Preheat heat your grill to 500 degrees.


While your grill heats, prep the avocado “salsa”.

2 cups diced avocado
1 cup grilled fennel, cut into strips
1 cup diced tomatoes
½ cup roasted corn kernel
¼ cup black beans
¼ cup diced red onion
¼ cup diced artichoke

1 T olive oil
1 T lemon juice
1 T lime juice
1 T srirracha or
hot chili paste
1 t minced garlic
Salt and pepper to taste

Grill chicken and serve over a large helping of “salsa”! Some mixed greens under the dish would also be a nice addition. Feel free to add some of the salsa juices over as a light dressing.

Lanjut membaca “Cleavers Garlic Lemon Chicken over Avocado Fennel “Salsa””  »»
  • Digg
  • Del.icio.us
  • StumbleUpon
  • Reddit
  • RSS

Grilled Mesquite Pork Chop with Peach Salsa


Marinate a fresh pork chop with a generous portion of Cleavers Southwestern Mesquite Rub. Let marinate for 24 hrs. Grill to the temperature of your liking, and top with Peach Salsa

Peach Salsa
2 cups of fresh diced peaches
½ cup diced watermelon
½ cup diced cantaloupe
¼ cup diced strawberries
¼ cup diced red bell peppers
¼ cup fresh diced red onion
¼ cup fresh diced poblano peppers
2 T minced cilantro
2 T diced green onions
2 T honey
1 t minced garlic
1 T red wine vinegar
1 T olive oil
Salt and pepper to taste

Mix all ingredients and let rest for one hour before serving.
Serve over the Cleavers Mesquite Pork Chop and grilled chayote squash.

Lanjut membaca “Grilled Mesquite Pork Chop with Peach Salsa”  »»
  • Digg
  • Del.icio.us
  • StumbleUpon
  • Reddit
  • RSS

Banana wholemeal scones


• 1 cup flour
• 4 teaspoons baking powder
• ½ teaspoon salt
• 2 cups wholemeal flour
• 1 tablespoon butter
• 2 tablespoons honey (or golden syrup)
• 1 ripe banana, mashed
• 1 cup milk

  1. Preheat oven to 215degC. 
  2. Sift flour, baking powder and salt into large mixing bowl, then add wholemeal flour.
  3. Melt butter and honey in microwave, add mashed banana, then combine with dry ingredients. 
  4. Add milk and mix to form a soft dough. If too sticky, add extra flour. 
  5. Turn out onto lightly floured surface and pat into a 2cm thick round. Cut scones out and place on baking tray. 
Bake for 10-12 minutes.

Lanjut membaca “Banana wholemeal scones”  »»
  • Digg
  • Del.icio.us
  • StumbleUpon
  • Reddit
  • RSS

OATMEAL MUFFINS


• Preheat oven to 350°.
– Combine:
– 1 mashed banana
– 12 Splenda® packets (or sweetener of choice)
– 3 egg whites
– 2 teaspoons vanilla extract
– ½ cup unsweetened applesauce
– 1 cup unsweetened almond milk
– 2 cups fast cooking oats
– 1½ teaspoons baking powder
– 2 teaspoons cinnamon
– Fill 10 well-greased (PAM®) muffin cups.
– Bake for 12-14 minutes.

(I like to add half a cup of plain Greek yogurt for a more complete snack.)

Lanjut membaca “OATMEAL MUFFINS”  »»
  • Digg
  • Del.icio.us
  • StumbleUpon
  • Reddit
  • RSS

Pomegranate Glazed Filet Mignon with Harissa Steak Sauce


Makes: 4 servings
Prep Time: 15 minutes
Cook Time: 45 minutes

INGREDIENTS:
Pomegranate Glaze
1 cup pomegranate juice
2 tablespoons sherry or cider vinegar
2 tablespoons brown sugar
2 tablespoons fresh thyme, minced
1 teaspoon ground cardamom
½ teaspoon ground black pepper

Harissa Steak Sauce
1 tablespoon ground caraway seeds
½ tablespoon ground coriander seeds
½ tablespoon ground cumin seeds
1 tablespoon garlic powder
¼ cup ketchup
¼ cup sherry vinegar
¼ cup Worcestershire sauce
2 tablespoons chives, minced
1 teaspoon honey
1 teaspoon chile paste
4 Walmart Choice Premium Filet Mignon Steaks

Instructions:
1. In a medium sauce pan, combine Pomegranate Glaze ingredients and cook over medium heat, reduce
mixture by 30 percent. Then strain and cool the mixture, set aside.
2. Toast the caraway seeds, coriander seeds, cumin and garlic powder in a dry pan until fragrant. Add remaining
Harissa Steak Sauce ingredients, except the chives and bring to a simmer. Simmer for 10 minutes,
remove from heat and let cool. Stir chives into finished sauce.
3. Preheat the grill using Kingsford® charcoal, until briquets are consistently ashed over.
4. Season the steak liberally with salt and pepper.
5. Grill the steaks over a medium high fire until lightly charred on one side, approximately 4 minutes. Flip the
steak and baste with the Pomegranate Glaze, after an additional 2 minutes of cooking baste the steak again.
7. Remove the steak from the grill and allow to rest for 6 minutes.
6. Baste the steak again after resting and serve with a side of the Harissa Steak Sauce.

Lanjut membaca “Pomegranate Glazed Filet Mignon with Harissa Steak Sauce”  »»
  • Digg
  • Del.icio.us
  • StumbleUpon
  • Reddit
  • RSS

Grilling Recipes

 Grilled Sweet Pepper Rellanos with Goat Cheese, Charred Corn and Apricot


Rev up your grill for this summer season and enjoy some time with family and friends. At the park or your backyard, it’s that time to get some grilling done. Get a a juicy and tender Choice Premium Steak an let’s get started. Follow these tasty recipes from the Walmart Choice Steak Challenge for a month full of Hmmmm. Presented by Walmart, Kingsford® Charcoal and Coca-Cola.

Recipe's created by Chef Chad Johnson,
of Bern’s Steak House in Tampa, Fla. on behalf of the Walmart Choice Steak Challenge. Chef Chad Johnson is originally from Louisville, Ky. and started at SideBern's about eight years ago as a cook and worked his way up through the ranks. He became executive chef  four years ago

Makes: 4
Prep Time: 5 minutes
Cook Time: 25 minutes

INGREDIENTS:
12 mini sweet peppers
1 ear sweet corn, shucked
8 ounces Chevre, or other soft goat cheese
½ cup dried apricots, diced
2 tablespoons basil, chopped

Instructions:
1. Preheat the grill using Kingsford® charcoal, until briquets are consistently ashed over.
2. Grill peppers over a medium fire until lightly charred on all sides, place peppers in a bowl and wrap with
plastic wrap, allow to cool to room temperature.
3. Char corn on the grill over high heat until moderately charred, remove and cool, remove corn kernels from the cob.
4. Mix the goat cheese, charred corn, apricots, and basil. Season with salt and pepper.
5. Cut a slit in the side of each pepper and gently scrap out the seeds. Fill each pepper with the goat cheese
mixture until full.
6. Return stuffed peppers to the grill and cook over medium heat until the goat cheese is warm and soft.


Lanjut membaca “Grilling Recipes”  »»
  • Digg
  • Del.icio.us
  • StumbleUpon
  • Reddit
  • RSS

Swiss roll


• 4 eggs
• 125g caster sugar
• 2 tablespoons warm water
• 1 teaspoon vanilla essence
• 125g flour

For the filling
• 6 tablespoons strawberry or three-berry jam
• 225ml cream

  1.  Preheat oven to 190degC. 
  2. Line the base of a 25cm x 38cm swiss roll tin with baking paper, and brush with melted butter.
  3. Beat eggs and caster sugar together until  light and fluffy, then add water and vanilla essence. 
  4. Sift flour, and fold into wet ingredients. 
  5. Pour mixture into baking tin and bake for 12–15 minutes, or until the centre of the cake springs back when touched and the edges have shrunk away from the sides. 
  6. Gently tip the swiss roll onto a piece of  baking paper sprinkled with caster sugar. Remove baking paper from the bottom of the cake.
  7. Place a clean, damp tea towel over the cake for 30 minutes and allow to cool. The damp tea towel will prevent the cake from drying out.
  8. Meanwhile, make the filling. Beat the whipped cream until soft peaks form. Add jam, then beat until stiff peaks form.
  9. When cake is cool, dollop jam onto it, then a layer of whipped cream. Roll up the cake and sprinkle with caster sugar or decorate with a chocolate rose.

Lanjut membaca “Swiss roll”  »»
  • Digg
  • Del.icio.us
  • StumbleUpon
  • Reddit
  • RSS

Battenberg cake

This sponge can be cooked the day before.
The sponge will be firmer and easier to handle.

• 175g butter, softened
• 175g caster sugar
• 3 large eggs, lightly beaten
• 2 tablespoons milk
• 175g self-raising flour
• red food colouring
• apricot jam
• 2 tablespoons icing sugar
• 350g readymade marzipan

  1. Grease a 20cm x 15cm oblong tin and line base and edges with baking paper. Cut another piece of baking paper, the same length and width as the tin. Fold the paper in half, lengthways. 
  2. Preheat oven to 180degC. 
  3. Cream butter and sugar in food processor until light and fluffy. Gradually beat in eggs, one at a time. Transfer mixture to a large mixing bowl. 
  4. Add milk, mix, then fold in flour. 
  5. Divide the cake batter in two and spoon one half into one half of the tin, along the length. Place the extra piece of baking paper in your tin in the middle, so that it divides the two sponge mixtures.
  6. Use enough food colouring to tint the remaining cake mixture pink, then add the batter to the other half of the tin. Bake for about 15-20 minutes, until firm to the touch.
  7. Let cool for 5 minutes then turn out onto a wire rack. Let cake cool completely. Trim both halves to the same size, then cut each half down their length.
  8. Warm apricot jam, then brush onto the top and sides of each cake strip. Place one pink strip and one plain strip side by side. Place another pink strip and plain strip on top of these, in a chequerboard effect.
  9. Roll marzipan into a rectangle of 20cm x 30cm. Place cake at one end and wrap marzipan around it. Pinch seams together and place seam on the bottom.

Lanjut membaca “Battenberg cake”  »»
  • Digg
  • Del.icio.us
  • StumbleUpon
  • Reddit
  • RSS

Basic cupcake recipe


• 125g butter, softened
• ¾ cup caster sugar
• 1 teaspoon vanilla essence
• 2 eggs
• 2 cups self-raising flour
• Pinch salt
• ¾ cup milk

Lemon Icing
• 1 cup icing sugar
• 1 tablespoon lemon juice
• 1 teaspoon butter, softened
• Boiled water

1. Preheat oven to 190degC.
2. Cream butter, sugar and vanilla essence until light and fluffy. Add eggs, one at a time, and beat until combined.
3. Transfer to large bowl and fold in sifted flour and salt, alternating with the milk.
4. Pour mixture into cupcake cases until half fill. Bake for 10-15 minutes or until golden brown.
5. To make the icing, sift icing sugar into bowl and mix with lemon juice. Add butter and pour half to 1 teaspoon boiled water over butter to melt. Whip icing together to a smooth consistency. Ice cupcakes.

Lanjut membaca “Basic cupcake recipe”  »»
  • Digg
  • Del.icio.us
  • StumbleUpon
  • Reddit
  • RSS

Make your own cheese


Cheese is a simple thing to make from the milk of cows, goats, sheep – or yak, llama and horse if you’re feeling a bit adventurous! It’s best to start simple and get the steps of the fresh cheeses mastered before jumping in at the deep end, unless you have chooks or pigs who would appreciatively eat your mistakes. Fresh cheeses, or cheeses which are not cooked or aged, are very simple to make, and you can be eating your delicious results in as little as 12 hours from paddock to plate.

Using a starter
Milk becomes cheese through the actions of bacteria. Raw milk will have a variety of naturally occurring bacteria (and even pasteurised milk will pick up bacteria from the environment). But if we rely on this random mix of bacteria to produce our cheese, we’ll get inconsistent results. Instead, we seed the milk with a culture of bacteria known to produce good cheese. We use a mesophilic starter culture for lower-temperature cheeses (for which the milk is heated to between 25degC and 40degC), such as feta, gouda, cheddar, chevre, and manchego. If we’re heating the milk to between 45degC and 80degC (as for parmesan), we use a
thermophilic starter.


Cheese is a living, breathing thing, and results can be as variable as the environment in which it is prepared and the cultures that are used. Commercially available starter cultures are readily available and will give you more consistent results while you are perfecting your techniques of making and aging cheese. Bin Inn carries some cultures, Trade Me has a number of sellers, and there are online mail order places that sell cultures as well, such as Cottage Crafts.
 Which milk?
Supermarket milk is fine to use, as long as it’s not the UHT milk, out of which any useful bacteria has been completely destroyed by the heating process. Green top milk also isn’t that great to use, as there’s not enough milk solids in it. Full fat is good, whole milk is even better. Calcium chloride will have to be added to supermarket milk to get a good curd. Calcium chloride, available online and at some Bin Inn shops, should be added according to the label’s instructions.

Easy Cheese
The easiest recipe to make can hardly be called a recipe. Just about every culture has its own version of it. It’s just fresh milk and food acid. Using lemon juice or vinegar is the most basic, about ¼ cup juice or vinegar to 2 litres of milk. You may have to adjust the amount of acid you use, as acidity will vary. Our favourite curdling agent is apple cider vinegar, which leaves a very pleasant taste with the cheese.
Heat the milk slowly to 85degC, stirring occasionally to avoid scorching. When it has reached the correct temperature, remove from heat and stir in your curdling agent. Immediately you should see small curds forming. What you are looking for is something that resembles very small cottage cheese curds. If you don’t get this the first time, stir in a little more of whatever curdling agent you have chosen to use.
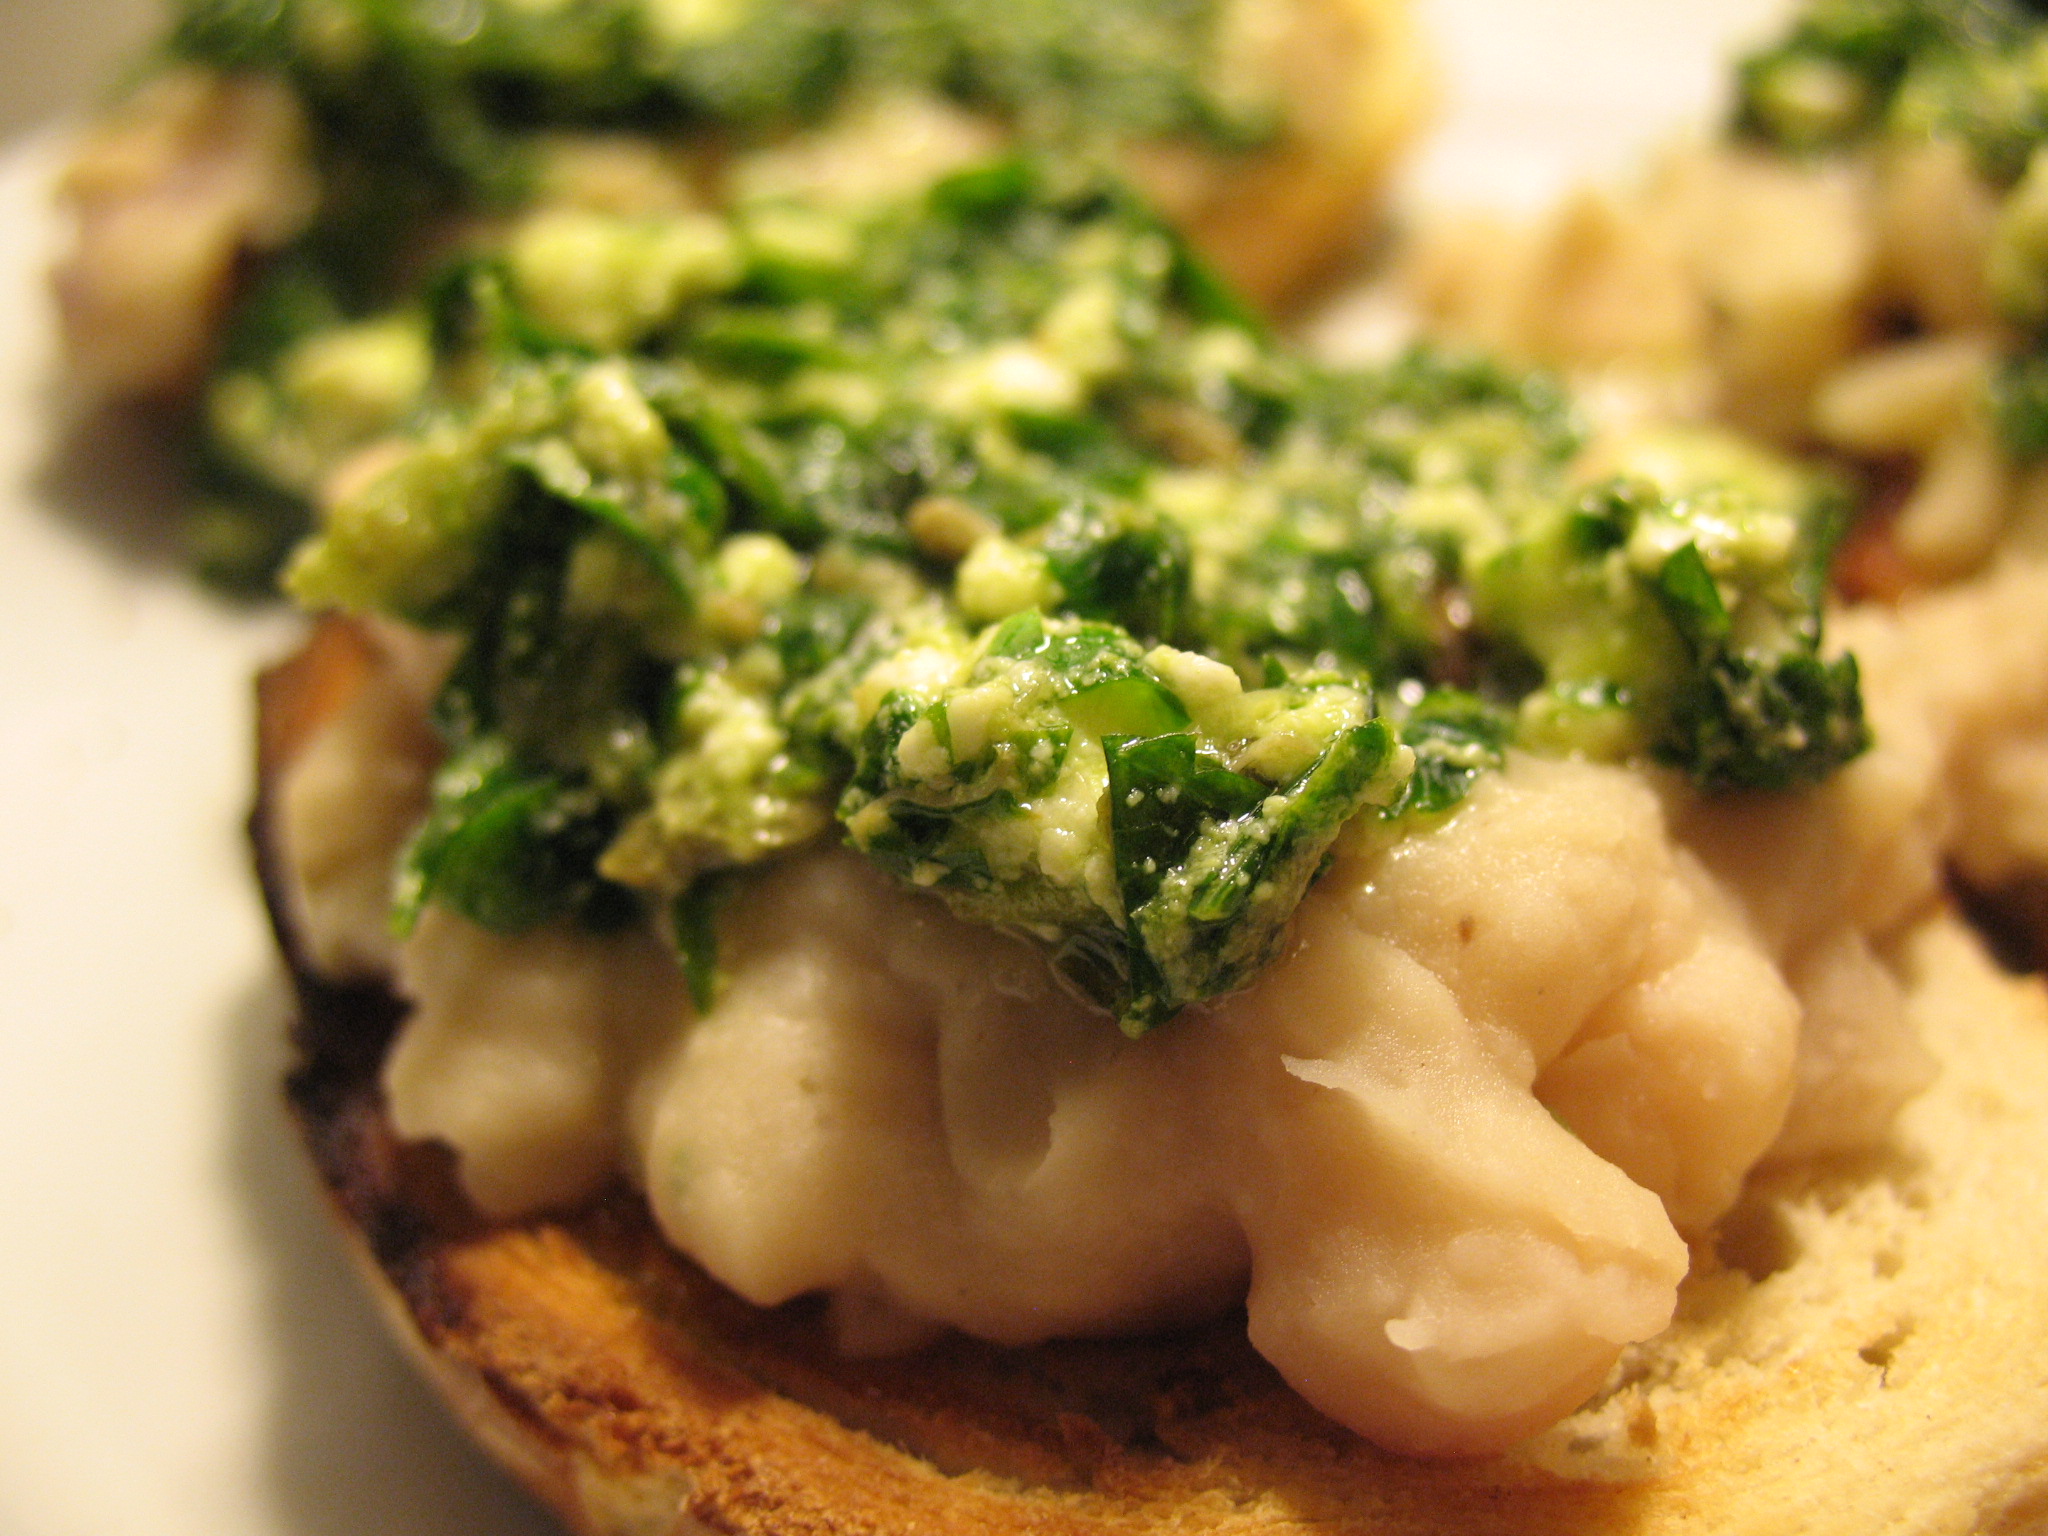
Strain through a dampened cheesecloth, muslin, clean cottontea towel or something with a similar fine weave. The reason for dampening is that the whey will drain out easily rather than splashing up in your face. Hang the curds in the cloth to drain overnight, or up to about 24 hours. This is a fun cheese to experiment with, and one you can enjoy right away, sliced on crackers or a crusty loaf, or fried and served with a nice garlicky bruschetta. It will keep well in the fridge for up to 2 weeks, stored in an airtight container.

Variations: Have some fresh or dried herbs ready before you add your acid. Basil and oregano are especially nice. As you ladle out the curds, add a sprinkling of salt and herbs, so it will be layered up when it hangs. You can also add things like chopped olives or jalapeño chillies, sundried tomatoes – the limit is your imagination. Another nice thing about this cheese is you can fry it and it doesn’t melt! If you get really ambitious, you can invest in or make some cheese moulds, and drain it in different shapes.
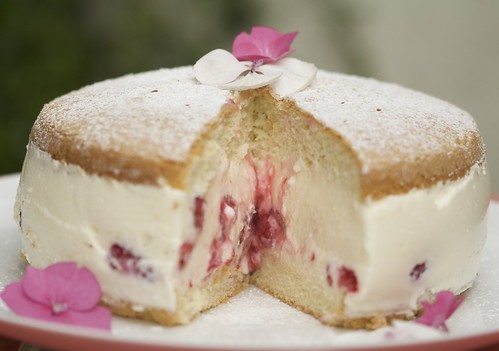
Chevre Cheese
Chevre is the generic word used for any goat cheese and comes in many shapes and flavours. Originating in France, this versatile cheese can be used as a sweet or a savoury, served fresh or aged. One of the simplest recipes follows, and can be adapted for use in so many recipes. We use this mixed with minced garlic and sea salt as a spread or dip, plain in lasagne in place of ricotta, and with icing sugar added to taste in a sponge with liberal lashings of raspberry jam and chocolate fudge sauce. You can even use it in place of cream cheese in cheesecake recipes.

  • 4 litres goat’s milk (you can use half the amount, and then use half the amount of starter. You can also use cow’s milk, with a thicker result and slightly different taste.)
  • 1 packet direct-set chevre starter culture (which also contains the setting agent) OR 1/8 teaspoon mesophilic culture OR if you have your own homemade starter  culture, use 1 tablespoon.
  • Rennet (if you use the prepared starter culture, omit rennet and water)
  • Water (non-chlorinated)


In 5 tablespoons of cool water, place several drops of junket rennet (Renco is readily available in many New Zealand supermarkets. Again, if you are using the directset starter, leave out this step. If you are using something other than junket rennet, follow the packet instructions for the volume of milk you are using. The amount of rennet will vary according to the type of curd set you need for the cheese you are wanting to make. Heat the milk to 30degC. Add the starter culture and stir thoroughly. Add 1 tablespoon of your dilute rennet solution, and stir again, slowly and thoroughly. Cover and let set at room temperature (approx 22degC) for 12 hours, or until it is set like a loose jelly. It may take more time, it may take less. Line a colander with a fine towel or two layers of cheesecloth. Ladle the curd into the colander. Tie the corners of the cloth into a bag and let drain for 6-12 hours, till a nice, spreadable consistency is achieved. This keeps up to two weeks in the fridge. If you can bear to leave it to age for two weeks in a dark corner of the fridge, it takes on a whole new dimension of flavour complexity.

Lanjut membaca “Make your own cheese”  »»
  • Digg
  • Del.icio.us
  • StumbleUpon
  • Reddit
  • RSS

SOUTHWESTERN BLOODY MARY


Serves 6


  • 3 cups spicy hot v-8 juice
  • 2 tablespoons fresh lemon juice
  • 1 tablespoon minced fresh cilantro
  • 1 tablespoon Worcestershire sauce
  • 1 teaspoon adobo sauce (from canned chipotle chilies in adobo)
  • 1 teaspoon ground cumin
  • 1 teaspoon sugar
  • 2/3 cup chilled vodka
  • 6 celery ribs , with leafy tops
  • 6 fresh red chilies, slit
  • Ice cubes


Directions:
1. Mix first 7 ingredients in pitcher. Chill mix ture until cold, at least 2 hours or overnight.
2. Mix in vodka.
3. Fill glasses with ice. Pour Bloody Mary mixture over. Garnish with celery and chilies.

Lanjut membaca “SOUTHWESTERN BLOODY MARY”  »»
  • Digg
  • Del.icio.us
  • StumbleUpon
  • Reddit
  • RSS

CROCK POT COCONUT/ TOMATILLO PORK CHOPS


Serves 4
prep time 15 min.
Cook time 7 to 8 hrs

  • 4 pork chops 11/4 inch thick
  • 10 tomatillos
  • 2 garlic cloves
  • 1/2 Spanish onion
  • 1 teaspoon of cumin
  • 3 cans of coconut milk
  • I 1/2 cups of chicken stock
  • 2 jalapeño
  • 1 sheet of banana leaves
  • 4 bay leaves
  • Salt and pepper to taste

Directions

Season pork chops with salt and pepper. In a blender mix all of the ingredients except for the bay leaves and banana leaves . Place the pork chops with the coconut - tomatillo mix cover it with the banana leaves and cook over night in low heat until tender .  Degrease the juice and blended until smooth , you can use that
as a sauce .

Lanjut membaca “CROCK POT COCONUT/ TOMATILLO PORK CHOPS”  »»
  • Digg
  • Del.icio.us
  • StumbleUpon
  • Reddit
  • RSS

Asparagus and Mozzarella Bake

Ingredients
Many of you will be familiar with the traditional recipes associated with asparagus, so I thought I would show you one that isn’t so well known, but is absolutely delicious and can be used for a family meal or as a dinner party dish. Cook the asparagus in salted boiling water until al dente. Drain and allow to cool, then toss in the olive oil.
Grease a baking dish (approximately 44cm x 24cm) with the butter.
Lay sixteen of the asparagus spears on the bottom, cover with some of the mozzarella slices and
sprinkle some basil leaves on top.
Pour over half the chopped tomatoes, season with salt and pepper and then sprinkle 200g of grated
parmesan on top.
Repeat the process making sure that when finishedthe top is covered with the remaining parmesan.
Bake in the centre of a preheated oven at 180c or Gas 4 for approximately 20 minutes.
Once cooked, allow to rest for five minutes before serving.
Serve with a green salad and hot crusty bread.

Lanjut membaca “Asparagus and Mozzarella Bake”  »»
  • Digg
  • Del.icio.us
  • StumbleUpon
  • Reddit
  • RSS

MASCARPONE VANILLA CHEESECAKE WITH POACHED RHUBARB


Serves: 4 (but you can save
some for the next day!)
Prep time: 20 minutes
Cooking time: 30 minutes

Special equipment: 4 x 7cm x
4cm deep steel ring moulds
659 calories
53g fat

Raise a glass fit for a princess , Chablis is one of the world’s finest white wines. It can be PRI CEY , but there are some bargains to be had, says Rob Buckhaven citrusy Tesco Chablis (£7.79) has turbo flavours of lemon and green apple. Blagger’s guide To be called “Chablis”, the grapes used in the wine must have been grown entirely in the tiny French village of the same name. MASCARPONE VANILLA CHEESECAKE WITH POACHED RHUBARB

*A little oil for greasing
*4 digestive biscuits
*20g unsalted butter, at room temperature
*1 egg
*80g caster sugar
*2tsp flour
*1tsp vanilla extract
*200g cream cheese
*50ml double cream
*120g mascarpone
*2tsp lemon juice For the rhubarb
*2tbsp caster sugar
*1 largish stick of rhubarb, cut at an angle into10 x 2.5cm piece

Preheat the oven to 150˚C/300˚F/gas mark 2. Cut strips of baking parchment that fit inside each of the steel ring moulds, then lightly oil the moulds so the paper sticks to the sides. Place the moulds on a baking tray lined with baking parchment and set aside. Put the biscuits and butter in a food processor and pulse to make fine crumbs. Divide equally between the prepared ring moulds to evenly cover the bottom. Use the end of a rolling pin to press the crumbs down to make a firm base. In a large bowl, beat together the egg, sugar, flour and vanilla extract until the mixture is light and fluffy. While still mixing, add the cream cheese, double cream and mascarpone, until the mixture is smooth. Be careful not to over beat the mixture or it will become too firm and will be difficult to transfer to the moulds. Divide the mixture between the 4 ring moulds, then smooth off the tops with the back of a spoon. Tap the baking tray on the bench a few times to expel any air bubbles, then place in the oven on the middle shelf and bake for 20-25 minutes. When the cheesecakes are ready, the centres will still be a little soft, but they will firm up as the cheesecakes cool. Carefully remove from the oven and leave to cool in the moulds. To make the poached rhubarb, tip the sugar into a bowl and then toss in the rhubarb, coating it all over with the sugar. Transfer the rhubarb on to a small baking tray lined with baking parchment and sprinkle any excess sugar over the top. Cover the tray tightly with foil, then bake in the oven for 15 minutes. Remove from the oven and leave to cool to room temperature before peeling off the foil. To serve, gently run a knife around the inside of the cheesecake moulds to release the edges of the cakes. Slide the moulds off, then carefully peel away the paper and place the cheesecakes on plates. Put a few pieces of the poached rhubarb on top of each cake, then spoon some of the rhubarb cooking juices over the top.

Lanjut membaca “MASCARPONE VANILLA CHEESECAKE WITH POACHED RHUBARB”  »»
  • Digg
  • Del.icio.us
  • StumbleUpon
  • Reddit
  • RSS

RIB-EYE OF BEEF WITH CARAMeLISED ONION GRATIN AND GREEN BEANS

Serves: 2
Prep time: 25 minutes
Cooking time: 1 hour 30 minutes

*2tbsp olive oil
*1 large onion, peeled and finely sliced
*1 clove garlic, peeled and minced
*3 sprigs thyme
*400g baking potatoes, peeled
*250ml chicken stock
*Salt and black pepper
*2 x 180g rib-eyesteaks, trimmed of visible fat
*150g fine green beans

Preheat the oven to 190˚C/375˚F/gas mark 5. Heat half the olive oil in a shallow frying pan, then add the onion, garlic and thyme and sauté until lightly golden. Turn the heat down, stirring the onions every few minutes until they’re soft and sticky (about 20 minutes). While the onions are cooking, finely slice the potatoes into 3mm slices. Heat the stock in a pan, then add the sliced potatoes and cook, stirring occasionally, until the potatoes soften (5-6 minutes). Mix the caramelised onion with the potatoes, then season with salt and pepper. Tip the mixture into four large ramekins, or a 20cm x 20cm x 5cm deep ceramic dish, and press down, then drizzle over the remaining olive oil. Bake in the preheated oven for 35-40 minutes, or until the potatoes are cooked through and golden on top (check by piercing with a skewer or small knife). Put a saucepan of water on to boil. Place a heavy frying pan over a high heat and add a little oil. When it starts to smoke, season the rib-eye steaks on both sides with salt and pepper and place them in the hot pan. Cook for 2 minutes, then turn the steaks over and put the green beans in the boiling water to cook. After a further 2 minutes, remove the steaks from the pan and leave in a warm place to rest for 5 minutes. This will give you medium-rare steaks – cook for longer if you like. When the beans are cooked, tip into a colander to drain and season with a little salt if you wish. Slice up the steaks, then divide between warm plates with the green beans and some gratin on the side.

Lanjut membaca “RIB-EYE OF BEEF WITH CARAMeLISED ONION GRATIN AND GREEN BEANS”  »»
  • Digg
  • Del.icio.us
  • StumbleUpon
  • Reddit
  • RSS

mixed grill of seafood


Ingredients
  • 1 live lobster, about 600g/1lb 5oz
  • 1 medium squid (calamari),
  • cleaned and prepared
  • 1 John Dory (or tilapia), about 350g / 12oz, scaled, gutted, fins and tail trimmed and deheaded
  • A couple of slices of monkfish, cut across the tail through the bone, leaving the bone in
  • A few raw prawns with the shell on
  • Olive oil
    Sea salt and freshly-ground black pepper
    1–2 tbsp herb mixture for grilling
    A handful of flat-leaf parsley,
    finely chopped to garnish
    Lemon wedges and your choice of dressing (see introduction) to serve


Method
Place the lobster on a chopping board. Insert a large, sharp, heavy knife into the cross on the back of the head and cut down towards the tail, cutting it in half. Remove the stomach and the black intestinal tract (if there is one) that may run through the middle of the tail and discard.
Slice the squid from top to bottom, then open it out and make diagonal cuts across it, first one way and then the other, making sure the depth of the cut is halfway through the thickness.
Preheat the barbecue, or the grill (broiler), to hot. (If barbecuing, ensure the flames have died down and the
coals are glowing and covered with white ash before cooking.) Brush all the prepared fish and shellfish with
olive oil, season and sprinkle with the grill mixture.
Gently grill the squid, cut side down over the hot coals, or cut side up under the grill (the squid will curl up on
itself) until golden and evenly charred on the knobbly bits – about five minutes. Gently grill the lobster, flesh side down over the hot coals, or flesh side up under the grill, for five minutes, then turn it over and cook for a further 4–5 minutes – it should be nicely scorched and grilled. Meanwhile, put the monkfish and John Dory on or under the grill and cook until nicely charred – about four minutes on each side. Grill the prawns for 4–5 minutes until pink. Place all the fish on a big platter, sprinkle with parsley and sea salt and serve with a few lemon wedges and your choice of dressing. One of my favourite meals of all time!

Lanjut membaca “mixed grill of seafood”  »»
  • Digg
  • Del.icio.us
  • StumbleUpon
  • Reddit
  • RSS

Seared radishes with radish leaf miso pesto


 by Shu Han LEE


Following the brilliance of Fergus Henderson and his St John’s Restaurant, nose-to-tail eating has
gotten chefs to reconsider and even be excited about ears and trotters and cuts that have previously been discarded. It just makes a lot more sense for the environment and your own pocket, to fully use and appreciate all that has been sacrificed to feed your stomach. I think we need to apply this to vegetables
too, a sort-of “shoot-to-root” or “topto- toe” eating. It pains me to see people pluck the tops off beetroots, or the outer leaves off cauliflower, when the whole plant is perfectly good to eat. I’ve used the radish here as an example, its blushing pink roots are much-lovedin spring, but its leaves are actually just as delicious, with a nice mustardy bite not unlike rocket or watercress. It’s nonsense that people are willing to pay for those little leaves in their salads when you can get equally tasty ones free. I’ve moved away from the usual raw salads here though. Many don’t realise this, but radishes are great cooked! I don’t mean mushy, tasteless, over-boiled radishes; pan-seared ones still retain a slight refreshing crunch. At the same time, their sharpness mellows, and their light sweetness comes through, a great contrast to the salty peppery pesto. I’ve given a slight Asian twist to this vegan-friendly pesto, using miso instead of Parmesan for a savoury depth.

Seared radishes with radish leaf miso pesto

Ingredients
  • 1 large bunch of whole radishes
  • 1 small handful of toasted pine nuts or almonds
  • 2 cloves garlic
  • 2 tbsp naturally fermented white miso
  • Generous pinch of unrefined sea salt, freshly ground black pepper
  • Extra virgin olive oil
  • Squeeze of lemon

Method
  1. Prepare the radishes, separate tops from bottoms. Chop the bottoms into equal-sized pieces, halved or quartered if large. Wash the tops to remove any dirt from the leaves and roughly chop.
  2. For the seared radishes, heat some oil over medium-high heat, and when just sizzling, add the radishes cut-side down. Season, and sear until golden brown, about 5 minutes. Flip and repeat on the other sides.
  3.  For the pesto, combine all the ingredients except lemon in a mortar and pestle, or a food processor, adding the evoo as you go, enough to make a smooth paste. Finish with a squeeze of lemon. This will keep in the fridge for a couple of days if submerged under oil.

Lanjut membaca “Seared radishes with radish leaf miso pesto”  »»
  • Digg
  • Del.icio.us
  • StumbleUpon
  • Reddit
  • RSS

Sweet Eve Strawberry Hawaii Slush


This is a delicious, healthy drink that you can make with children for afternoon tea in the summer or as a pudding after their meal. If you make the recipe using freshly squeezed orange juice it will taste so much better than carton juice. Serve the slush in a tall glass with an umbrella and straw for an instant party feeling.

Serves 4 / Preparation time: 15 minutes / Freezing time: 2 hours

Ingredients
  • 250g Sweet Eve strawberries
  • 2 ripe bananas
  • 2 ripe mangos
  • 2 ripe peaches
  • ¼ watermelon
  • 250ml of fresh orange juice
  • 2 tbsp of honey
  • 2 tbsp lemon juice
Method

Firstly prepare the fruit. Hull the strawberries and slice them in half. Peel the bananas and chop into chunks. Peel the mango and cut the flesh into cubes. Slice the peaches into quarters. De-seed the watermelon and chop into chunks. Place all the fruit on a plastic tray or baking tray that is covered with greaseproof paper and put in the freezer for two hours, until the fruit is solid. Place the frozen fruit in a liquidiser or blender. Add the orange and lemon juice and honey and whizz until smooth. Pour the Sweet Eve Strawberry Hawaii
Slush into tall glasses and serve.

Lanjut membaca “Sweet Eve Strawberry Hawaii Slush”  »»
  • Digg
  • Del.icio.us
  • StumbleUpon
  • Reddit
  • RSS

Sweet Eve Strawberry Tapas


This is such a simple and easy way of serving fresh, ripe seasonal strawberries at the end of a relaxed supper party. Everyone can get stuck into their preferred flavour combinations, and can taste each accompaniment. Ricotta is an Italian whey cheese and can be found in most supermarkets. Let the sweet and fragrant taste of Sweet Eve strawberries speak for itself, or enhance it by dipping in this wonderful array of spices and flavours.

Serves 4 / Preparation time: 15 minutes

Ingredients
  • 500g fresh Sweet Eve strawberries
  • 100g Schwartz black peppercorns
  • 100g red peppercorns
  • 250g Galbani® Ricotta cheese
  • ½ teaspoon of Schwartz ground cinnamon
  • 100ml of aged traditional, balsamic
  • vinegar from Modena
  • Zest of 1 unwaxed lemon
  • 100g unrefined soft brown cane sugar

Method

Hull and clean the strawberries, removing the green stem with a teaspoon. Now slice the strawberries in half, and place them in a serving bowl on a tray. Prepare 5 more small bowls, all to be served on the same tray.
Using a pestle and mortar, lightly crush the black peppercorns, and then place them in a small bowl, on the same tray as the strawberries. Lightly crush the red peppercorns, as above, and place them in a separate
bowl, again on the tray. Mix the ricotta in another bowl with the ground cinnamon. Pour the balsamic vinegar in a small bowl. Place the lemon zest in another bowl, and mix in the sugar. Serve the prepared tray to your guests, and they can dip each strawberry into the flavours alternatively.

Lanjut membaca “Sweet Eve Strawberry Tapas”  »»
  • Digg
  • Del.icio.us
  • StumbleUpon
  • Reddit
  • RSS

Smoked mackerel with spring onion, fennel and watercress salad with mustard dressing and croutons


Serves 2

Ingredients
  • 1 medium smoked mackerel
  • 2 medium spring onions
  • ¼ fennel bulb
  • 1 bunch watercress, washed and picked through
  • 1 slice stale white bread, cut into approx 1 cm cubes
  • 6 tbsp virgin rapeseed oil
  • 1 tbsp cider vinegar
  • 2 tsp English mustard
  • ½ tsp runny honey


Fine sea salt, sea salt flakes and ground black pepper

METHOD
  1. First make the dressing. Mix together the mustard, honey, cider vinegar and 4 tbsp of rapeseed oil in a clean jam jar or small bottle with a lid and shake vigorously to blend. Taste, season with fine sea salt and adjust ingredients as preferred.
  2. Next the croutons: heat 2 tbsp of oil in a pan then fry the cubes of bread untilgolden all over. Remove from the pan and drain on kitchen paper.
  3. De bone and remove the skin from the mackerel and break the flesh up into bite-sized pieces.
  4. With a man doline or sharp knife, very thinly slice the fennel and spring onions.
  5. Mix together the fennel, water cressand some of the dressing and then arrange the salad. Place the watercress and fennel first on the plate, in a small pile, then lay on the pieces of mackerel, with sea salt flakes and black pepper, and finally the slices of spring onion over the top. Drizzle over more dressing and arrange the croutons roughly around the outside of the plate.

Lanjut membaca “Smoked mackerel with spring onion, fennel and watercress salad with mustard dressing and croutons”  »»
  • Digg
  • Del.icio.us
  • StumbleUpon
  • Reddit
  • RSS

Wild garlic


Also known as Ramsons, you’ll find bunches of slim, green, wild garlic leaves on our farmers’ market stalls
from Ted’s Veg to Brambletye Farm and naturally, The Garlic Farm. Alham Wood Dairy wraps them around their little Lambos buffalo milk cheese. Pasta maker Giovanni Carleschi of Simply Italian is passionate about
using local, seasonal ingredients in his products and uses wild garlic to make wild garlic pesto. If you spot
wild garlic growing wild, usually in woodlands but also spotted in inner London parks and open spaces, you’ll  not mistake it for anything else. Tear off a piece of leaf and the pungent aroma is an instant giveaway. Use it
in sauces, soups and salads, add to mashed potatoes, make pesto with it, and stir into a risotto. Like other
delicate leaves it will wilt immediately (think spinach) and leave behind a delicate breath of garlic.

Lanjut membaca “Wild garlic”  »»
  • Digg
  • Del.icio.us
  • StumbleUpon
  • Reddit
  • RSS

Smoked mackerel


If you usually buy smoked mackerel from the supermarket, do yourself and your taste buds a favour and instead buy direct from a fisherman and you won’t ever go back. Mackerel at farmers’ markets is caught by our fishermen from small day boats, often line caught and as fresh as you can get. Smoked, it’s often sold as a
whole fish rather than fillets, succulent and flavoursome. Full of omega-3 fatty acids and tasty too. This salad is great for spring; the robust flavours of the mackerel stand up well to the zingy watercress and crunchy fennel.

Lanjut membaca “Smoked mackerel”  »»
  • Digg
  • Del.icio.us
  • StumbleUpon
  • Reddit
  • RSS

Yoghurt pudding and poached rhubarb


Serves 4
Ingredients
  • Pudding
  • 2 large eggs
  • 50g caster sugar
  • 1 vanilla pod
  • 235g thick, natural yoghurt
  • Zest of 1 lemon and ½ orange,
  • finely grated
  • Juice of 1 lemon
  • 15g plain flour
Rhubarb
  • 4–6 sticks rhubarb
  • Coarse zest strips of ½ orange
  • and 1 lemon
  • 1 star anise
  • 300ml water
  • 1 seeded vanilla pod
  • 100g granulated sugar
  • 100g honey
Rhubarb
The appearance of rhubarb at markets after long, cold winters is always a cheerful sight. These beautiful bright pink stalks remind us that spring possibly isn’t too far away. Rhubarb was first grown in the UK around 1760 for scientific purposes, with indoor rhubarb a recent 19th-century occurrence. It has a long history of medical usage, dating as far back as 2700 BC in China where among other uses, it was utilised to ward off plague. In 1759 a Chinese emperor forbade the export of tea and rhubarb to the Russians after a border conflict in the northern part of China. Rhubarb is classified as a vegetable and it goes well with oily fish and fatty meats. Try pairing it with mackerel or pork belly. In the UK market, the first delicate pink-hued rhubarb is forced indoors. It’s followed later in the season by outdoor-grown strains. Although it doesn’t have the same fragile flavour, it holds a well-deserved place in our crumbles and pies and works beautifully with this yoghurt-based dessert. 

METHOD
  1. 1 Preheat oven to 180˚C. Place a large baking dish or tin with a little water in the oven.
  2. Separate the eggs – be especially careful that none of the yolk gets left with the white (the other way round is not so crucial). Beat the egg yolks in a bowl with threequarters of the caster sugar until thick and pale. Split the vanilla pod and scrape the seeds into the yolk mixture (reserve the pod). Mix well with the yoghurt, lemon and orange zest, flour and lemon juice to taste. 
  3. Bring a full kettle to boil.
  4. In another bowl add the remaining sugar with the egg whites and whisk to soft peaks. Gently fold the whites into the yoghurt and yolk mixture.
  5. Pour this mixture into a smaller baking dish and place this into the larger dish. Pour boiling water into the larger dish until it comes halfway up the side of the smaller dish.
  6. Place in the oven and bake for 30–40 minutes. Check occasionally that there is still sufficient water in the large dish.
  7. While the yoghurt pudding is baking, prepare the rhubarb. Put the water, zest, sugar, honey, star anise and leftover vanilla pod into a pan over a low heat until the sugar has completely dissolved. Bring to the boil then set aside for about 15 minutes to allow the flavours to infuse. Chop the rhubarb sticks into roughly 4 cm pieces.
  8. Check the yoghurt pudding is ready: it should be light brown on top of a light sponge, and like a custard underneath.
  9. Just before serving, remove the vanilla pod and pieces of zest, warm the syrup again to hot but not boiling and gently poach the rhubarb for about 2 minutes until tender but still holding its shape.Remove immediately from the pan. Serve on warm plates: rhubarb pieces just to one side with a light covering of the syrup and the yoghurt pudding next to and around the rhubarb.

Lanjut membaca “Yoghurt pudding and poached rhubarb”  »»
  • Digg
  • Del.icio.us
  • StumbleUpon
  • Reddit
  • RSS

Lemon and raspberry cupcakes


For the frosting
*200g full-fat cream cheese
*200g unsalted butter, softened
*500g icing sugar,sifted
*Finely grated zest of 2 lemons

For the sponge
*200g unsalted butter, softened
*200g caster sugar
*Pinch of salt
*Finely grated zest of 2 lemons
*4 medium eggs
*200g self-raising flour
*Punnet of raspberries, plus extra for decoration

For the sugar syrup
*150ml freshly squeezed lemon juice
*150g caster sugar

Equipment
*2 x 12-hole muffin trays
*24 large brown cupcake cases
*Piping bags
*Large round piping nozzle

Preheat the oven to 175°C/350°F/gas mark 4. Place the cupcake cases inside the holes in the muffin trays.
To make the frosting, place the cream cheese in a mixing bowl and beat until smooth and creamy. Place the
butter, icing sugar and lemon zest in a separate bowl and cream together until very pale and fluffy. Add the cream cheese, a little at a time, to the butter mixture and mix at medium-high speed until combined. Chill until set. To make the cupcakes, place the butter, sugar, salt and lemon zest in a mixing bowl and cream together until pale and fluffy. Beat the eggs lightly in another bowl and slowly pour into the butter mixture while whisking quickly. If the mixture starts to separate or curdle, beat in 2-3tbsp of the flour. Sift in the remaining
flour and stir until just combined. Using a tablespoon, place the batter into the cupcake cases until two-thirds
full. Drop 2 or 3 raspberries into each cupcake. Bake for 12-15 minutes until the tops are golden brown and spring back. Remove and rest for 10 minutes. While the cupcakes are baking, prepare the sugar syrup. Place the lemon juice and sugar into a saucepan and bring to the boil. Simmer until all the sugar has dissolved. Set aside to cool.

Using a pastry brush, soak the tops of the cupcakes with sugar syrup while they are still warm. Let them cool a little longer, then remove the cupcakes from the trays, and leave to cool on a wire rack. Fill a piping bag fitted with a large round nozzle with the chilled frosting. Pipe a swirl of frosting on top of each cupcake, then finish with a raspberry on top


Lanjut membaca “Lemon and raspberry cupcakes”  »»
  • Digg
  • Del.icio.us
  • StumbleUpon
  • Reddit
  • RSS

SUMMER BERRY CAKE


Serves: 12
Prep time: 1 hour
Cooking time: 20 minutes

For the sponges
*200g unsalted butter, softened
*200g caster sugar
*Pinch of salt
*Seeds of 1 vanilla pod
*4 medium eggs
*200g self-raising flour

For the sugar syrup
*150ml water
*150g caster sugar
*1 vanilla pod, scraped

For the buttercream
*250g unsalted butter, softened
*250g icing sugar, sifted
*Pinch of salt
*3tbsp mixed berry jam

For decoration
*1tbsp cocoa powder

Equipment
*3 x 15cm (6in) round cake tins
*Turntable
*Metal side scraper
*Cake stencil

First, bake the sponges one day ahead or they may crumble when trimmed. Preheat the oven to 175°C/350°F/gas mark 4. Grease the cake tins and line the bottoms with greaseproof paper. Place the butter, sugar, salt and vanilla seeds into a mixing bowl, and cream together until pale and fluffy. Beat the eggs lightly in another bowl and slowly add to the butter mixture while whisking quickly. If the mixture starts to separate or curdle, beat in 2-3tbsp of the flour. This will rebind the batter. Sift in the remaining flour and fold through until combined. Divide the batter mix evenly between the cake tins. Bake for 15-20 minutes, until
the sides begin to shrink away from the edges of the tins and the tops are golden brown and spring back to the touch. Remove them and rest for 10 minutes. While the sponges are baking, make the sugar syrup. Place the water, sugar and vanilla pod in a saucepan and bring to the boil. Simmer until all the sugar has dissolved. Set aside to cool. Using a pastry brush, soak the tops of the sponges with syrup. After they’ve cooled a little more, run a knife around the sides of the tins, remove the sponges and leave to cool on a wire rack. Once
cool, wrap the sponges in cling film and rest them overnight at room temperature.The next day, make the buttercream filling. Place the butter, icing sugar and salt in a mixing bowl and cream together until very pale and fluffy. Add the jam to the mixture and stir until combined. To assemble the cake, trim the sponges so they are all the same size, then sandwich together using one-third of the buttercream. Use the remaining buttercream to cover the top and sides. Centre your stencil on the top of the cake. Dust with cocoa powder, and remove the stencil. Serve the cake at room temperature

Lanjut membaca “SUMMER BERRY CAKE”  »»
  • Digg
  • Del.icio.us
  • StumbleUpon
  • Reddit
  • RSS

Balls peanut butter - melt in your mouth good


Sodium is a part of my life. Not necessarily that I would like to eat everything, but there is something about the praise that taste the best of itself is delicious.

This year, and spend the Christmas holiday arrived, and I did the thing that surprised everyone. And announced that I will do my holiday oven usual, which is not really the bread is much more like making candy. I thought that this would be useful because it may put in a lot of time and effort to improve myself with P90X, and I do not want me to surrender the will to holidays.

My decision and, of course, no support. So my husband decided to comprimise. I have no oven to do my holiday ... But I had to do until Christmas and Holiday cakes, gifts, candy, and peanut butter balls. So, I decided it was time to test my will power and go for it. After all, it was the holidays.

Now, I'm not really sure where the balls of peanut originated from, and I know that there are several different recipes out there that make similar kind of fun, with some of the different components. This is the recipe I've used for years, and part of my family cookbooks.

Not only are these delicious little sweet, but not easy to achieve this is in fact not necessary limited to only these holidays. I have been doing for years, with the exception of this year, and usually creates a surplus of them. After that I did and peanut butter balls set, usually a bag and freeze to remain fresh for longer periods of time.

However, this year, apparently did not do enough. Although usually find these balls of peanut butter in the freezer for me come June of this year did not get to the end of January. Gone are the peanut butter balls. Therefore, you made me think. Maybe I need to do something else. Children love them and, frankly, is not the worst gift you could have a craving for chocolate.

While the amount of calories depends on the type and the type of chocolate you use, (and of course how big your balls) this dessert almost 100 calories per transaction. I can not think of many other things that are worse than that. Unfortunately, you can not eat just one. So I have been warned.

Now let's get to it ...
Leave a large bowl and mix until
Once all mixed, it will be a large bowl of porridge. This is the time to get the others around to help you roll into balls. Be prepared, you will get your hands dirty!
Source: Barbergirl28
Components

A short list for this recipe, which is good because it means that most of the time you have everything at hand. Or, if you need to run to the store to pick up the ingredients, and you know you will not break the bank.

2 cups peanut butter
2 cups graham cracker crumbs (about half a pack of biscuits)
2 cups powdered sugar
1/4 cup margarine
A block of chocolate (dark or normal - whatever you prefer)

In addition to the ingredients, and Laszlo will need a large bowl for mixing ingredients in a bag the size of the gallon ziploc to crush the cookies into crumbs, measuring cups, wax paper so that the chocolate is set, grill and a double (to heat the chocolate).
Focus

Kids love to help do so. As you can see, is in deep concentration to ensure they have the size and shape perfect!
Source: Barbergirl28
Immersion and wetting
I have a special tool for sweets, but dunking a fork will work just as well. Make sure you cover the ball with chocolate. Work quickly. Hot chocolate and may cause balls of peanut butter to soften.

This is how we do ...

This recipe is easy. You can even get the kids involved in the initial stages.

As is the case in all the sodium, make sure you have all the elements and all the tools and ready for delivery. While nothing will happen if they do not because there is really nothing here on time, make your life easier in the kitchen.

The first thing we do is break down the cookie. I put some files in the whole bag at one time and then the delivery of children outside. Like the crumbling up. When you are done, take a rolling pin on top to make sure there is not much left over collapses.

Now measure the ingredients ... Mix peanut butter, crackers, powdered sugar and ghee. Do not try this with a spoon. It will take forever, and your arm gets tired. Even get dirty with it, and dig with both hands. It will be the best consistency and it is much easier for you.

Once everything mixed, to take to the small balls. Do you want to put a piece of waxed paper on cookie sheet and put there. After the ball is thrown, you can go directly to a reduction in chocolate, but I prefer them, and put it in the refrigerator or freezer for about an hour. This will help them to continue together to begin to put it in hot chocoloate.

Now is the time to prepare the chocolate. In the water instead of chicken in a double down the stairs and chocolate in the top drawer. Even if you have a double broiler and you probably already know that! Melt the chocolate.

When ready, place a sheet of waxed paper and start dipping your balls in chocolate. Let's put it on waxed paper until chocolate is good and tight. Then you can put on the decorative plate for everyone to enjoy or can be packaged in a gallon ziploc bag and put it in the refrigerator or freezer. Usually freeze mine, and can be up to 6 months or more.

Yes - It's that easy!

Homemade Pierogi - sometimes the meal comes with a story behind it. Do not miss this great center of the facts and traditions of the family with all the mixed ingredients. And his mouth watering, you do not even dare to give this a try.

Revenge - Lip Smackin "Well - not a recipe ... but for some it may be very good!

Ice cream and peanut butter pie - if you have something to peanut butter, this is the candy you do not want to miss.
Some additional observations

This recipe produces 50 to 60 different balls, depending on how large you make.
This is a great gift for a deal with other goodies such as a nice gift, homemade.
This is very easy ... Even the children of participants.
While it is good to have children involved, and should always be adults who make a decline in chocolate. Chocolate and pan is hot, and can cause burns.
You will get dirty. Do not wear clothes in the best of what they have to this adventure.
Once and dropped balls in the chocolate and let the plan out of the fridge for at least an hour or two. You want to make is good and solid before packing them.
Feel free to change it. While in normally just use chocolate, and this year I was dark chocolate. The results were a surprise, which is probably why we have gone.

This is a sweet enough that having one is definitely a treat for the sweet tooth.
Sarah is not if you do this once and people suddenly being asked to do so again.
These balls peanut butter is addictive. I dare to eat just one!

Lanjut membaca “Balls peanut butter - melt in your mouth good”  »»
  • Digg
  • Del.icio.us
  • StumbleUpon
  • Reddit
  • RSS

How to make whole wheat pancakes moist and fluffy


Easy recipe for pancakes: Sri soft wheat pancakes

Anyone can make a decent omelette. But not everyone can make a surprisingly fluffy, golden brown, and a healthy cake that would make the doctor proud. What is the secret to fluffy pancakes from scratch?

We know that whole wheat has a tendency to produce a thick pancake. However, today you will learn how to make whole wheat bread with a secret special wet. Yes, you read correctly. Moist, thin, and healthier. This easy recipe calls for the replacement of 1/2 pie white flour with whole wheat flour and ... Sour cream. Just follow the secrets below and you're on your way to health is perfect for pancakes.

Whole wheat pancakes light and fluffy in the inside and golden on the outside, with a touch of freshness.
It's the little things that make a difference!

Secret # 1: Let the dough rest at least 10 minutes.

Let the mixture stand at room temperature for at least 10 minutes. Allow to soak up some flour liquidity in the cluster, while allowing the gluten to relax. Supported after the mixture and get something bubbly, do not mix.

Secret # 2: Beat the egg whites

Separate eggs and beat egg whites until stiff, then add in the rest of the dough.

Secret # 3: Temperature Control

If cooking on the stove, and measuring the temperature in the pan, and put a few drops of water in and see if the "dance" around. If the fall was just sitting there, it's too cold and if it evaporates too quickly, the weather is very hot.

If you are using a language with the temperature of the plate, which coincides with the temperature of the thickness of the mass. I prefer my pancakes on the thinner side, so I set to 350F.

= Mass of the HOT PAN thin (to cook food quickly) heavy hitter = COOLER PAN (to give time to cook through)

Secret # 4: Cream

Sour cream gives these pancakes divine silky texture and richness and added to taste. Are safe enough and healthy, but can not be made tremendous progress in the number of calories your own. Using a combination of both flour and whole wheat white flour gives a nutty sweet and fiber increase, however, does not produce dense tissue. He added a recipe for some oil and butter, but do not really need. Sometimes less is more. In this case, doubt about what to expect.

Secret # 5: Do not pay your pie

For the love of God, and resist the urge to press the pancake with your spatula. This is not one of those hitting the "mole" games. Delivered once and let it do its thing!

Wait waaaait ... To ...
I see a bubble!
The component is ....!
Sour cream and adds that "wow factor" that led to the super full WET wheat pie.
Wheat pancakes recipe

Ingredients for pancakes:

½ cup whole wheat flour
½ cup All purpose flour
2 teaspoons sugar
2 teaspoons baking powder
Half a teaspoon of salt
3 tablespoons of sour cream
¾ cup of low fat milk, 2% (or whole milk)
1 egg large

Technique is simple:

· Monitoring of the dry ingredients in a bowl (flour, sugar, baking powder and salt)
· Beat the eggs in a separate bowl. Add milk and sour cream.
· Add the dry ingredients slowly, beating briefly after each addition until smooth. Do not over mix. There is nothing wrong in getting some of the blocks.
· Let the mixture sit for at least 10 minutes.
· Scoop ¼ cup of the mixture in the pan / grill and cook for 2-3 minutes.

* Use a long spoon, carefully passed under each pie on the face.

· Let the pancakes cook for 2 minutes.

· Pies my feet on the spot! Enjoy with a little pure maple syrup!

Lanjut membaca “How to make whole wheat pancakes moist and fluffy”  »»
  • Digg
  • Del.icio.us
  • StumbleUpon
  • Reddit
  • RSS

Chicken Flamingo - a recipe my favorite tradition


This recipe seems like a lot at first, but after making this a few times this is a cinch. I make it on special occasions, and it is great when we are having a party too large. Can not be grilled chicken on the grill outside or inside. I also used my George Foreman grill for the preparation of this and that works great too. I use the outdoor grill if I'm having a few guests because you can cook the chicken more at one time. If I'm just making a few meals or if it was raining and I use the grill in enclosed spaces. Snow was falling yesterday so I used the stove top method.

I cook the side dishes in the same almost every time. This is what the parties can order in a restaurant and they make it a complete meal! I also worked out of time so that the completion of each item of the cooking at the same exact time. I will give the recipe this way so it is very easy to follow.

Wash all vegetables and chicken. Asked once what kind of soap, one should be used to wash the chicken, so let me be clear, were not you want to use Dawn dish soap or any other soap on food. The cold water should do the trick!

Preheat oven to 450 degrees collect your ingredients, and lets get this party started!
Source: RealHousewife
Potatoes

Red or brown potatoes
Olive oil
Italian seasoning

A slice of potato to 8 wedges. Coat them with olive oil workshop with Italian spices or garlic. If you want you can simply use salt and pepper. Bake for about 40 minutes or until potato wedges are golden brown.
Source: RealHousewife
Prepare the chicken

Chicken breast or chicken Tenderloins
Olive oil
Panko bread crumbs
Salt
Pepper
Provel cheese

I use a hammer to attack meat chicken and laminate it. It also allows me to cook more evenly since the meat flat and thinner, but this step is not necessary. I next roll the chicken in olive oil, then bread crumbs, but this is set up very slightly baked you do not have to worry about paint so perfect.

Put the chicken on the grill and cook for about 10 minutes on each side over medium heat.
Source: RealHousewife
White wine sauce

White wine such as Pinot Grigio or CHABLIS
Sliced ​​mushrooms
Prosciutto Ham
1/2 C of butter
1/2 C of lemon juice
1/2 C of white wine
1/8 tsp. Of red pepper flakes.

Mix all ingredients together except pork prosciutto. Bring to a boil low and allow these elements together to cook until the chicken. Toss pork during the last minute of cooking the sauce. This should take about 20 to 30 minutes for flavors to combine reality and mushrooms and to absorb the sauce.

Steamed broccoli

I use a steam basket is a way to prepare vegetables for me. I just trim the florets and steam them until they are bright green, about 8 minutes. If you overcook the broccoli turns ugly, and they are very soft. Home cooks pasta sauce with broccoli in it - and this does not allow the flavor to penetrate the vegetable sauce, but it can turn into a green color in the sauce so I do not do this.

Grilled chicken at a time of your own potatoes is that you should be prepared to come out of the oven and should be broccoli. I melt a little cheese provel on the top of the chicken. You do not want to drown the chicken with the sauce - is a bit tart so you only need a few tablespoons and it is perfect!

Lanjut membaca “Chicken Flamingo - a recipe my favorite tradition”  »»
  • Digg
  • Del.icio.us
  • StumbleUpon
  • Reddit
  • RSS

Egg mayonnaise sandwiches sandwich is the perfect party.


And it's very popular mayonnaise egg sandwich recipe is quick and easy to make delicious.

A step by step guide on how to make egg sandwich in May.

Therefore, the necessary ingredients for a box full of snacks, but you can change to make a single egg mayonnaise sandwich or a few only.

And take all the pictures in this article for the establishment of this wonderful sandwiches myself. When I give step by step and one of the quick and easy recipes for me, I always use the images of my method.

I think it creates a rule that honest and straightforward, and shows how to create these wonderful recipes that use all the time with my kitchen.
Egg mayonnaise sandwiches: My own
View all 16 photos
Cook the eggs for seven minutes
Method

Egg mayonnaise sandwiches

Components

Ten large eggs
Twenty piece of bread, white or brown
Parsley
Mayonnaise
Salt

Step 1

Laying eggs carefully in cold water and boil for seven minutes.
The water should cover the top of the eggs.
Added two pinches of salt to the water as this will prevent eggs from cracking in hot water.
Place eggs in a bowl of cold water

Step 2

When boiled for seven minutes left in the hot water for two minutes again.
Pour hot water and add the boiled eggs in a bowl of cold water.
Remove the egg shells.

If this is the reduction of difficult sometimes to the rear of the eggs in cool water and continue to remove all the shells from eggs
Remove the bark of hard-boiled eggs
Eggs with shells removed
Mashed boiled eggs almost

Step 3

Mash up egg with a fork.
First, by this almost large pieces.

Then, still using a fork to make boiled eggs into small pieces suitable for egg sandwiches in May.
Boiled eggs mashed fine
Fresh parsley
Add the chopped fresh parsley

Step 4

Add fresh parsley
Chopped fresh parsley straight from the station a big difference with the taste of these eggs mayonnaise sandwiches.

You can grow in your garden or buy a factory in the supermarket, and stopped growing in a pot in a sunny spot in your kitchen.

Delete a group of plants and cut parsley storks.

The parsley cut into smaller pieces.

The number and size of chopped parsley depends on your preference.

I prefer to let parsley is sufficiently large that are clearly visible in the sandwich.

This also brings back the taste of this wonderful herb.

Mix eggs in a bowl.
Boiled eggs and fresh parsley
Add the mayonnaise with the egg and parsley

Step 5

Take tablespoons of mayonnaise and put it in a small bowl.
The amount will depend again on the taste.
I would use a lot of mayonnaise, as it brings the ingredients together, and makes a delicious sandwich.

It should be moist and white wet mixing time is everything.

At this stage you can add a little salt, but only very little in that the eggs do not really need much flavor to it.

Cover the bowl with plastic wrap and let stand in refrigerator for thirty minutes.
The mixture of whole egg mayonnaise
Make an egg mayonnaise sandwich

Step 6

Butter your bread.
Mayonnaise remove eggs from the refrigerator.
Spread mixture over bread sandwich.
Egg sandwich cut into triangles at the Mayo Clinic.
Place on a tray covered with a large size.
Garnish with chopped fresh parsley.

Leave in the refrigerator until needed.
The quick and easy recipes: eggs, mayonnaise sandwiches

As you can see in this guide step by step through the egg mayonnaise sandwich is popular fast and easy to make delicious to eat. I have included pictures of me and I prepared this recipe so you can see how easy it is to make these egg mayonnaise sandwiches.

Until next time to organize the party at home Why not add egg mayonnaise sandwich in his lunch for the party.

Lanjut membaca “Egg mayonnaise sandwiches sandwich is the perfect party.”  »»
  • Digg
  • Del.icio.us
  • StumbleUpon
  • Reddit
  • RSS

Vegetarian PIZZA

If you are a strict vegetarian, or a new plant in particular, or if you have to cook for a vegetarian, you may wonder how to make a good vegetarian pizza.

Make a vegetarian pizza is very simple, and that vegetarians eat cheese. Therefore, you can make a cheese pizza, or even just a natural cheese pizza loaded with all kinds of vegetables.

The challenge for the vegetarian pizza is the fact that vegetarians do not eat cheese. A cheese plant for sale, and, of course, but even before it goes on this road should consider something else.

Original pizza, one in which all the others are pizza originated in Naples in southern Italy and is known as the Pizza Marinara. That the original pizza, for the first time a reality, not cheese.

This seems very strange to most of us who are used to match the stringy cheese pizza dripping. However, in Italy and southern Europe in general, pizza without cheese is very common.

In the Mediterranean region, covering North Africa and the Near East and South East Asia, Europe, and is sometimes used as a descriptive chips pizza dough. Pies, pizza without cheese is amazing too.

In fact, although we think of when we think of pizza in the pizza, making pizza great is the rule. Without the presence of a suitable base, no matter how good the ingredients are, unfortunately, and pizza will be a failure.

Is a real meal with Italian Marinara Pizza 00, and this is good, such as talcum powder, but with a lot of protein and gluten, so it can stretch very thin, but still very strong and an excellent thin crust base.

In addition, real pizza marinara must be baked in wood burning oven super hot, so hot pizza can be cooked in a little bit of every 60 to 90 seconds.

If you do not have a wood oven baked pizza, do not worry. Although you can get a wood fired ovens in the reach of your backyard now, and there is also a pizza oven amazing counter top that does an excellent job. Instead, you can get bread pizza stone also gives superior results.

Marinara Pizza is one true marinara sauce ingredients, oil, garlic, oregano and olive oil.

Again, the ingredients are very important here. It consists sauce tomatoes marinara with authentic San Marzano, oil, garlic, thyme and olive oil must be fresh.

Now if you want to add components to this, you must do so in moderation and good taste. American tradition of pizza rapid accumulation of food ingredients on the pizza is not for this purpose.

You can get a very innovative combinations, especially using such

Oven roasted garlic and red pepper pizza
Garlic and sun-dried tomatoes, olive oil and olive quality (with the drill!) And mustard seeds
Tomato pesto pizza
Mushrooms and artichokes seasoned with lemon juice and pepper pizza hearts
White garlic sauce with onions, homemade caramel, and fresh sliced ​​tomatoes, red pepper and a little chopped
Pizza Potato (paper thin sliced ​​potatoes with fresh rosemary, chopped, onion, pepper and ground (optional), and extra virgin olive oil) - Pizza certainly alien to the American ear, but a common favorite in Europe.

Now, if this is not for you, you can go from the traditional fast-food pizza the U.S., and only veganize.

Thus, a vegetarian alternative to cow's milk cheese, cheese, and you can even get a flavor of the meat alternatives pepperoni, salami or ham.

There are even vegetarian frozen pizza taste good too.

Regardless of the path you go, there really is a lot of options for vegetarians who want to eat pizza.

Not only that, but do not have to be a fake vegetarian alternative, but the real pizza, real, original, as it was supposed to be.

Lanjut membaca “Vegetarian PIZZA”  »»
  • Digg
  • Del.icio.us
  • StumbleUpon
  • Reddit
  • RSS